DEMO - Curved Poly Levels of Detail
Each Curved Poly model comes with a flexible set of Level of Details which can be highly customized on need. In this Demo we will see how a user can exploit Unity LOD Groups in order to change the Level of Detail at Runtime. We will use the Pepper Mill model here (simply named Pepper), which will be sent to you when you receive a copy of the beta version of Curved Poly - Runtime or Curved Poly - Shape Editor
Preparing Your Model
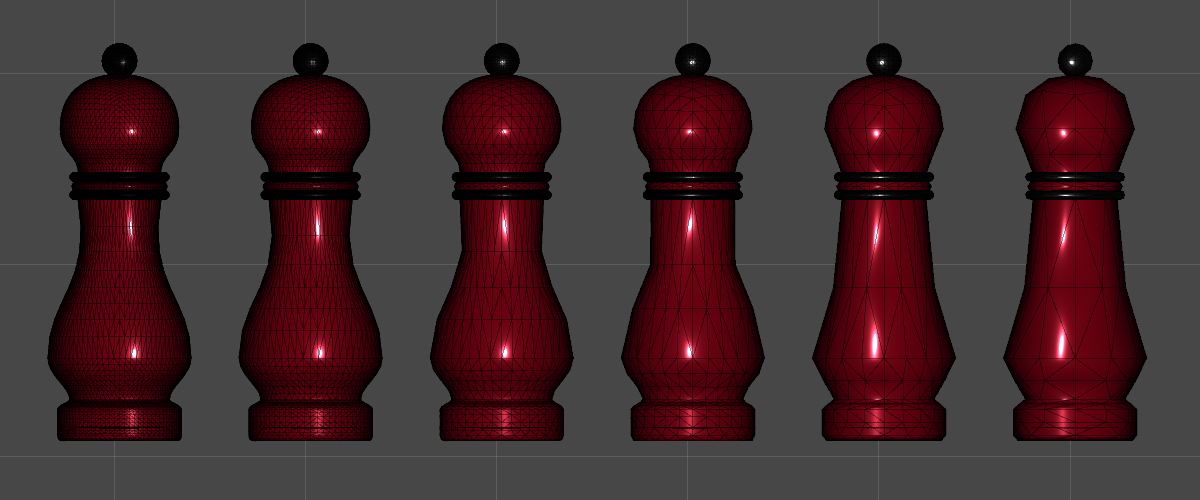
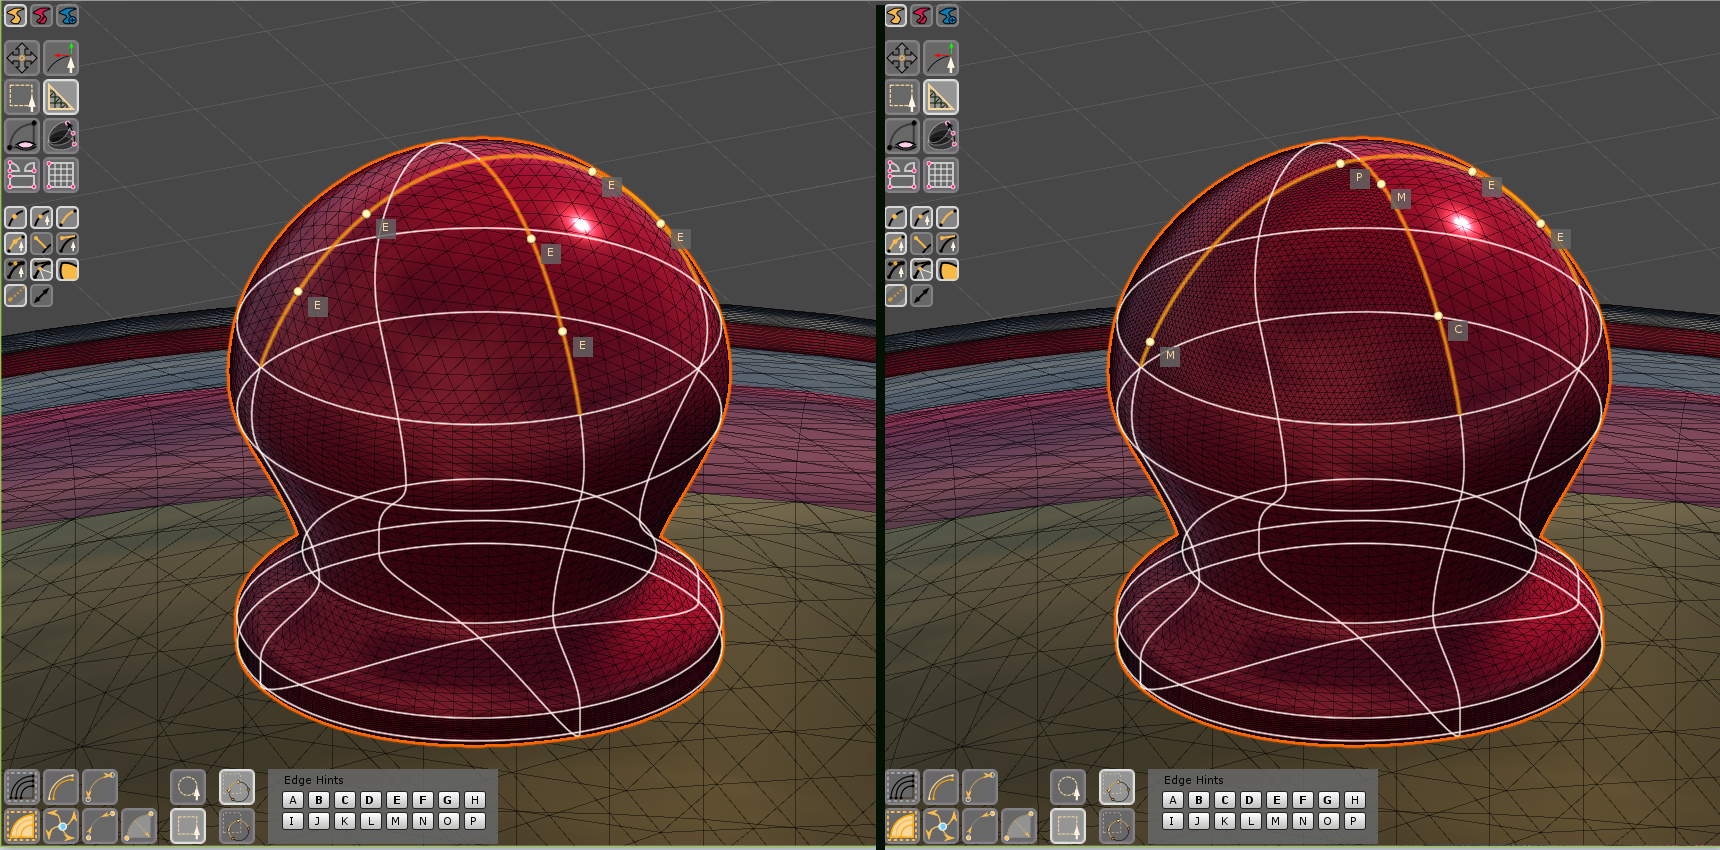
Curved Poly LODs system is highly customizable. Curved Polys are made of Curves. During mesh extraction processes, Curved Poly needs to know ho to convert each curve into a polyline. And to change a curve into a polyline, it needs to know how much lines must be generated. The more are the lines, the more detailed will be the final surface. In order to control this, each curve is assigned a hint, that is a little character from A to P, in alphabetic order, where A means, usually, a low number of segments, and P means, usually, an extremely high amount of segments. You can customize each curve with a different hint with the Tessellation Operator of Curved Poly - Shape Editor.
Preparing your LoDs
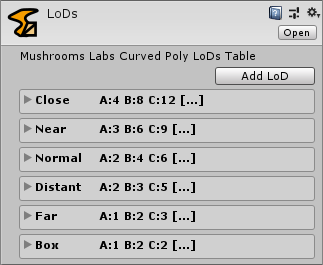
Hints are used to resolve the exact number of segments each curve will have at runtime. In order to do so, Curved Poly needs to refer to a LODs table, stored in a LODs Asset. A LODs table contains a list of LODs and for each LOD a list of 16 numbers meaning how much segments should be used for each hint. The LODs asset inspector allows you to generate new LODs, change the hints segments numbers and and view the table both by LOD or by hint, allowing you to keep total control of the amount of triangles generated by Curved Poly at Runtime.
You will find a default LODs Asset which should be pretty complete to do everything you need. The default LODs is attached by default to any newly generated Curved Poly. You can also create a new one by copying the default one and changing the LODs inside it, than you need to manually attach it on your Curved Poly component.
Using Unity LOD Groups
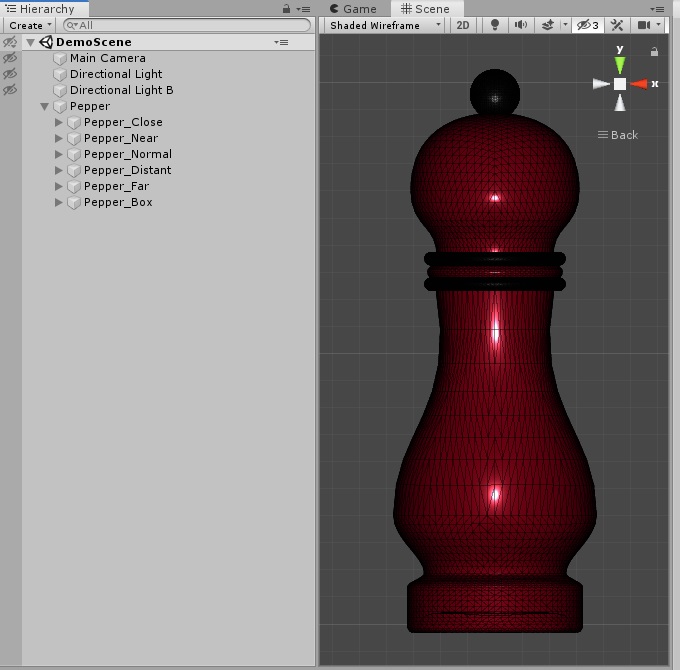
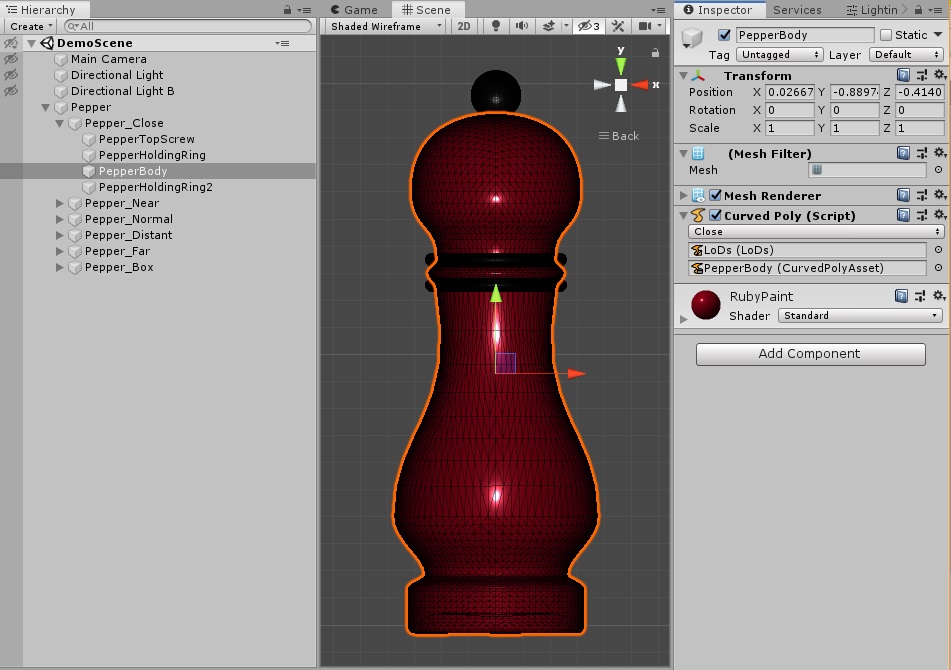
Create a new Scene. Create a new Empty Game Object in the scene and call it Pepper. Find the Pepper prefab in your project folder and add 6 copies of it in the hierarchy behind the Empty Game Object. Now: name each one of the copies adding one of the available LoDs we have prepared in our previous section. If you are using the default Curved Poly LoDs Asset, name should be something like Pepper_Close, Pepper_Near and so on.
Each clone of Pepper will contain four different Curved Poly parts. You need to correct the Level of Detail in the Inspector, on each Curved Poly component, to be consistent with the naming in the first step. So for example, on all the Curved Polys inside Pepper_Near we will set it to Near and on all the Curved Polys inside Pepper_Normal we will set it to Normal. It's a bit manual, but I want you to take this steps here to understand better how it works: at the end of this Demo you will find a piece of script code which can be used to automate the whole process.
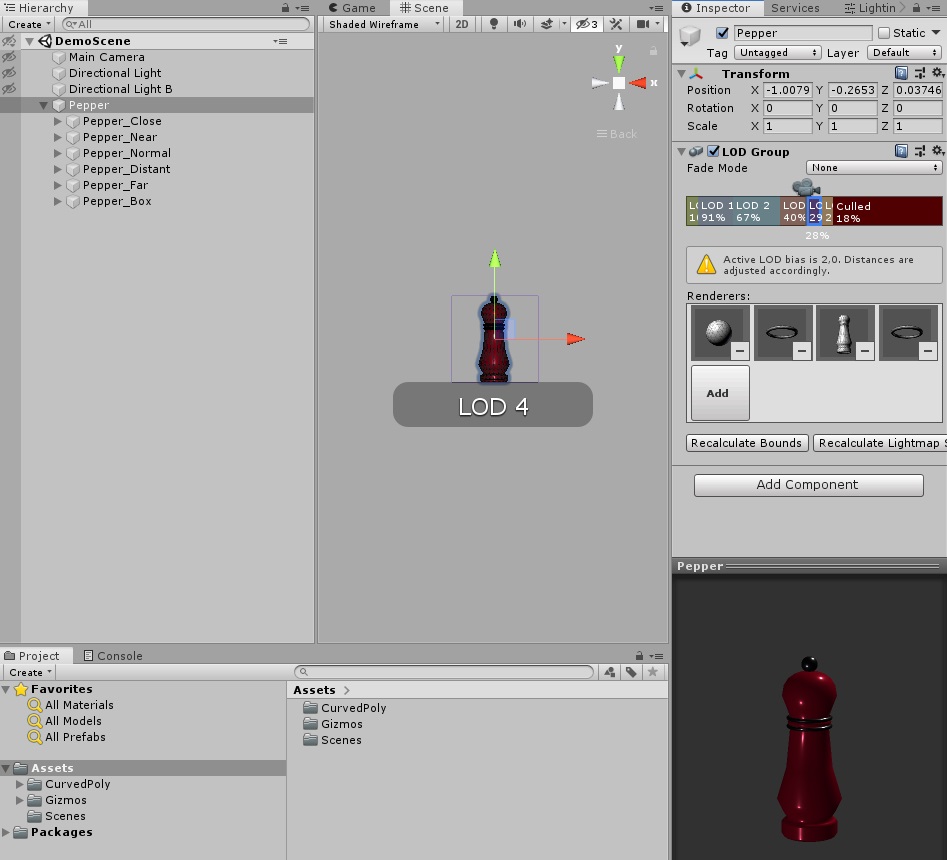
Get back to the Pepper GameObject you created during the first step, at the root of all pepper models. Add a LOD Group component. Check the colored bar in the inspector. Each different color stays for a different LOD. By Right-Clicking on the bar you should be able to add more LODs and you can drag the separatory lines between them to customize (refer to Unity Docs for more options and details ). Split the bar into 6 parts (or, if you are not using the default LODs asset, a number of parts equal to the number of LODs in your LODs asset), plus the 7th Culled part. Now you can click on each LOD one by one an drag in the Renderers Area one of the different Pepper variants : for instance, drag in the Renderes Area of LOD 0 the one named Pepper_Close, than drag in the Renderes Area of LOD 1 the one named Pepper_Near and so on. Again: this is a bit manual, but at the end of this Demo you will find a piece of script code which can be used to automate the whole process.
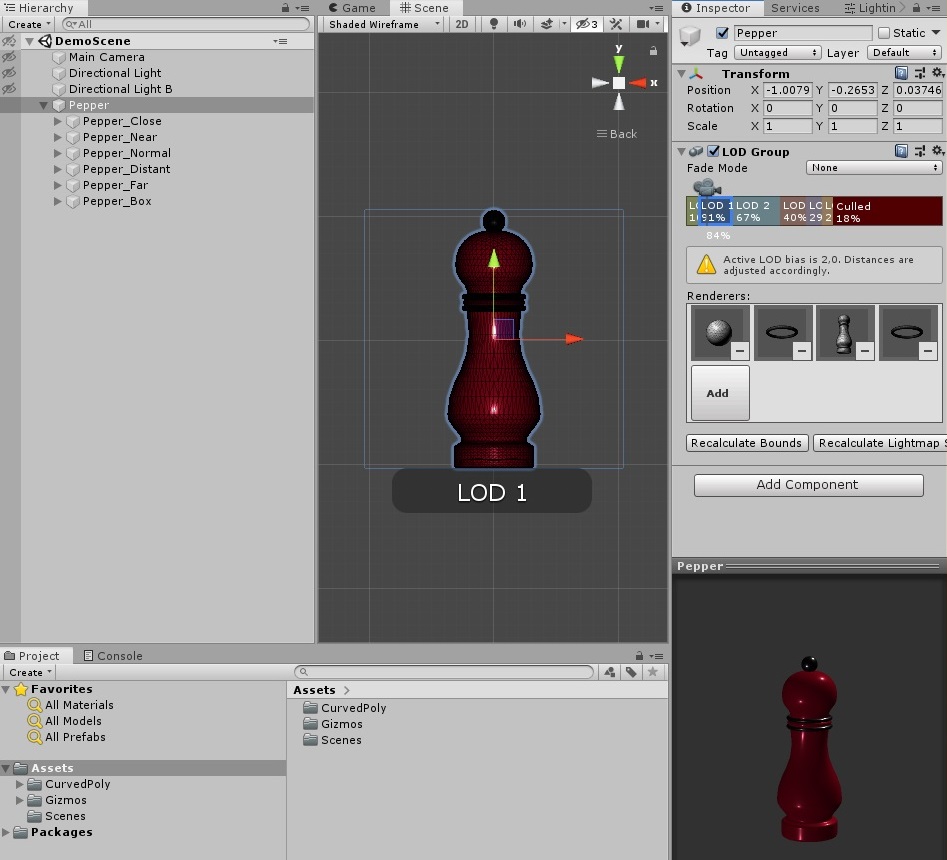
Now it's done. The LOD Group we've added will control automatically which version of the model need to be shown, which a calculation based on the rap between screen size and the extensions of the meshes calculated in each part of the model. You can try the effect by draggin the little camera icon on top of the colored bar.
Making it faster
Here is a very simple script which automates all the steps described in the previous section. It's a Unity Behavior you can attach to your Game Objects named GenerateLoDsGroup. You need to generate an empty Game Object first, than you need to assign this behaviour to it. You will need to provide two things here : the LoDs Asset you wish to use (this works with any LoDs asset, not only with the default one) and a Prefab containing Curved Poly models (like Pepper). This script adds a button to the default Inspector named Generate LoDs Group. After assigning the LoDs asset and the prefab, the only thing you need to do is to press the button. After that, you are free to remove the GenerateLoDsGroup component from your GameObject, since you should not need it anymore.
using System.Collections;
using System.Collections.Generic;
using UnityEngine;
using MLab.CurvedPoly;

#if UNITY_EDITOR
using UnityEditor;
#endif

namespace MLab.CurvedPoly.Demo
{
    public class GenerateLoDsGroup : MonoBehaviour
    {
        /*A prefab containing Curved Poly models. It will be instantiated more times,
        using all of the Levels of Details available in lods.*/
        public GameObject prefab;
        /*A Curved Poly LoDs Asset containing all the Level of Details you wish to use.*/
        public LoDs lods;

        public void GenerateLodsGroups() {

            /*size: count of lods available in lods.*/
            int size = lods.availableLoqs.Count;

            /*Generate a new LODGroup, attached to the same GameObject this script was attached.*/
            LODGroup lodGroup = this.gameObject.AddComponent();
            /*... and set its LOD size to be equal to size.*/
            lodGroup.size = size;

            /*Prepare an array of LOD descriptors.*/
            LOD[] uLods = new LOD[size];
            for (int i = 0; i < size; i++)
            {
                /*Find the proper LodData, with the index of the array, which is a row in lods LoDs table*/
                LodData lodData = lods.availableLoqs[i];
                /*Read the name*/
                string lodName = lodData.loq;

                /*Create a new GameObject by cloning the prefab. Name it with a combination
                of the prefab name and the lodName*/
                GameObject instance = GameObject.Instantiate(prefab, this.gameObject.transform, true);
                instance.name = prefab.name + "_" + lodName;

                /*For each CurvedPoly we can find in the cloned gameobject,
                we assign the LodIndex properrt with the index in the array.*/
                CurvedPoly[] curvedPolys = instance.GetComponentsInChildren();
                foreach (CurvedPoly curvedPoly in curvedPolys) {
                    curvedPoly.LodIndex = i;
                }

                /*Load all the renderers in the prefab copy and use them to
                instantiate the i-th LOD descriptor in the array.*/
                MeshRenderer[] renderers = instance.GetComponentsInChildren();
                uLods[i] = new LOD(1.0F / (i + 0.5f), renderers);

            }

            /*Assign the LOD descriptors array to the group and force a Bounds recalculation to make it operative.*/
            lodGroup.SetLODs(uLods);
            lodGroup.RecalculateBounds();

        }

    }
}


/*The following is a simple Custom Editor to enrich
 the Default Inspector for GenerateLoDsGroup with
 an easy to use button*/
#if UNITY_EDITOR
namespace MLab.CurvedPoly.Demo
{
    [CustomEditor(typeof(GenerateLoDsGroup))]
    public class GenerateLoDsGroupEditor : Editor
    {

        public override void OnInspectorGUI()
        {
            /*Draw all the parts of the Default Inspector*/
            DrawDefaultInspector();

            /*Draw a button with a "Generate LoDs Group" label. When the user press the button ... */
            if (GUILayout.Button("Generate LoDs Group")) {
                /*...the method GenerateLodsGroups in the script is executed*/
                (this.target as GenerateLoDsGroup).GenerateLodsGroups();
            }
        }

    }
}

#endif